Overview
Mutual TLS (mTLS) is a process that establishes an encrypted connection between two parties, for example Trulioo and a Trulioo API user. To establish this connection, both parties exchange digital certificates to authenticate each other.
mTLS is an opt-in enhanced security feature of Trulioo's API, configurable by customers at the parent account level. This means that you can create and manage your mTLS client certificates, and choose to enforce mTLS, across your entire organization.
Pre-requisites
Before you get started, make sure you have the following:
A Trulioo normalized API user account
This is your user account to access Trulioo's normalized API (NAPI) with or without mTLS. You will need a username and password for authenticating your API calls.
A "Manage mTLS" Customer Portal user account
This account will give you access to Trulioo's Customer Portal so you can generate your Trulioo mTLS client certificate.
You must use a Trulioo issued client certificate when connecting to Trulioo's API with mTLS.
If you don't have either of these, please reach out to Trulioo Customer Support at [email protected].
Connecting to NAPI with mTLS
mTLS endpoint
To connect Trulioo services using mTLS, you will need to use a different endpoint to the endpoint documented in this guide. All of Trulioo's APIs can be accessed with and without mTLS. If you choose to connect with mTLS, simply replace api.trulioo.com with mtls.primary.prod.trulioo.com.
If you currently connect to Trulioo without mTLS, you can continue to use your existing NAPI credentials with this new endpoint.
The mTLS endpoint is always available for use provided you have a valid Trulioo client certificate (see below).
Trulioo client certificates
In order to establish an API connection using mTLS, you will also need to install a valid Trulioo client certificate on the server you use to connect to Trulioo.
This certificate must be generated and provided by Trulioo. Client certificates generated for an account can only be used by API users within that account and cannot be shared with other organizations.
Organizations can have up to five live Trulioo client certificates associated with their account at any one time for connections using mTLS. This is to facilitate the use of different client certificates on sandbox/demo environments and production, and so that there is no need for downtime when a certificate expires.
Generating a Trulioo client certificate
To generate a Trulioo client certificate, you will need to create a private key and Certificate Signing Request (CSR). You will then need to login in to the Customer Portal using your Manage mTLS user credentials, and follow the prompts to upload your CSR and download the generated client certificate.
In order to establish an API connection using mTLS, you will need to install this Trulioo client certificate on the server you use to connect to Trulioo.
There are a number of ways to generate a private key and CSR. Below is a guide using OpenSSL.
Creating a Certificate Signing Request (CSR)
- Install OpenSSL on your computer if it isn't already installed. OpenSSL is preinstalled on Mac and Linux.
- Open a terminal on your computer and navigate to the location you want to save your private key and certificate to.
- Enter the following command. You can replace "server" with your common name or the domain name you intend to secure or any other file name.
openssl req -new -newkey rsa:2048 -keyout server.key -out server.csr
- You will then be prompted to enter your CSR information. Enter the details in the table below. You can opt to skip the rest. Note the following characters are not accepted: < > ~ ! @ # $ % ^ * / \ ( ) ?,&
- You will be prompted to add a password or passphrase. You are not required to enter a password or passphrase but this will apply an additional layer of security to your key pair.
- Your CSR and key will now be saved to the location you selected. Ensure your private key is kept safe. If you lose your private key you will need to generate a new client certificate.
| Input type | Input |
|---|---|
| Country: | The official two letter ISO country code of the country where your organization is incorporated e.g. CA. |
| State/Province: | The state or province where your organization is incorporated e.g. British Columbia. Do not abbreviate. |
| City/Locality: | The city or locality where your organization is incorporated e.g. Vancouver. Do not abbreviate. |
| Organization name: | The full legal name of your organization. |
| Common name | The domain name you want to secure with this certificate that will be connecting to Trulioo. This must be a fully qualified domain name (FQDN) e.g. services.company.com but does not need to be a published DNS name. Trulioo can support subject alternate names if required, but will not issue wildcard certificates. |
Testing mTLS with Postman
Adding a client certificate in Postman
- Open Postman.
- Select the Gear icon in the header and select Settings.
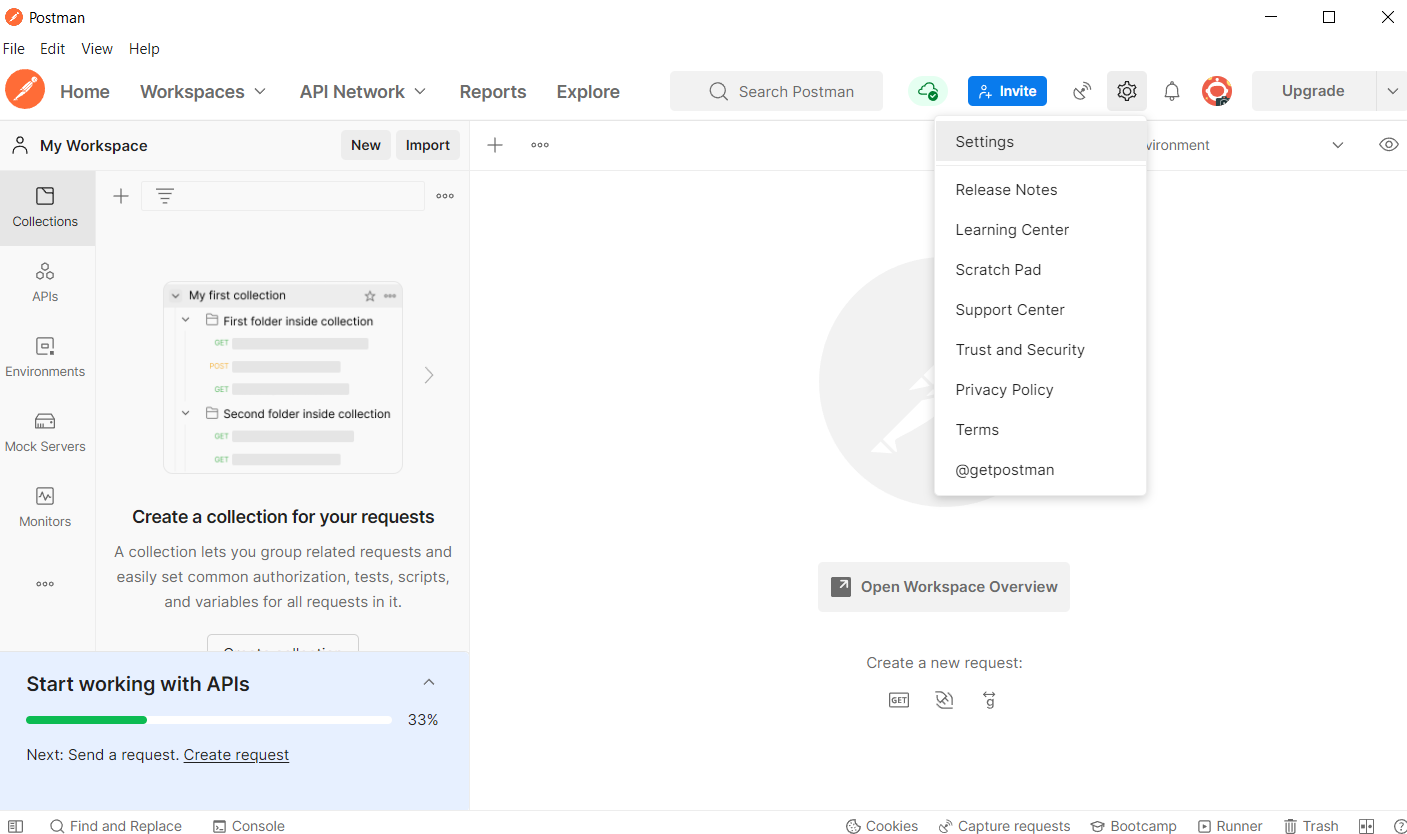
Postman Settings
- Select the Certificates tab and click the Add Certificate link.
- Enter https://mtls.primary.prod.trulioo.com in the Host field.
- Click the Select File button next to CRT file to add the client certificate generated by Trulioo and downloaded from the Customer Portal.
- Click the Select File button next to KEY file to add the private key paired with this certificate.
- If you used a Passphrase when generating your Certificate Signing Request, enter it in the Passphrase field. Otherwise, leave this blank.
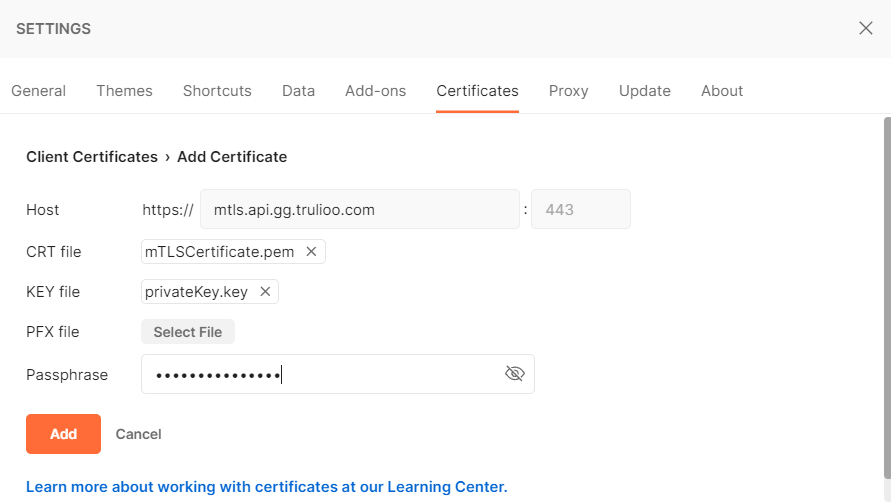
Adding a certificate
- Select Add to save.
Creating a request and testing the connection.
- Select the New button in the sidebar and click HTTP Request.
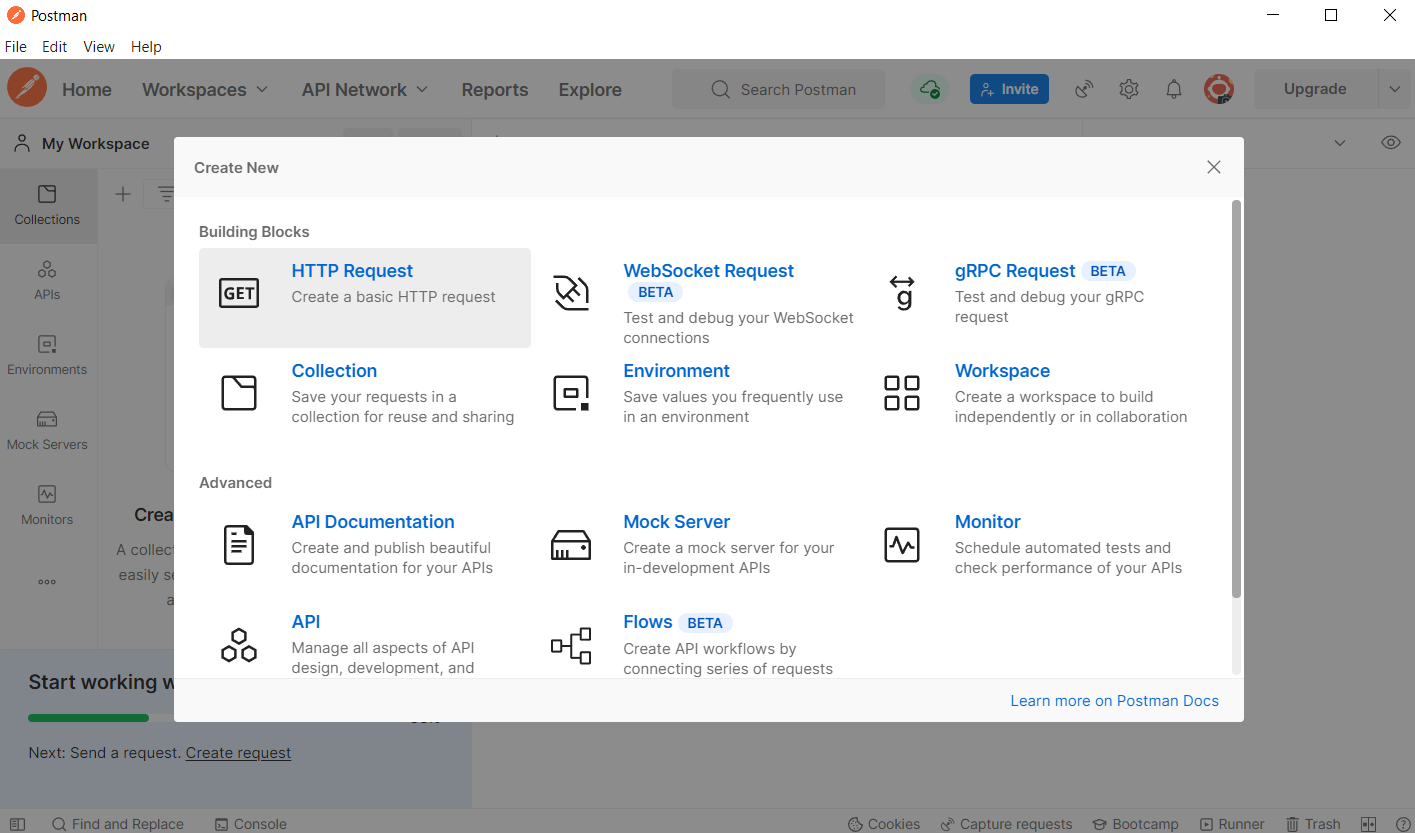
Creating a new HTTP request
- Provide the following URL in the Enter request URL field: https://mtls.primary.prod.trulioo.com /connection/v1/testauthentication. See Test Authentication for further details.
- In the request Auth tab, select Basic Auth from the Type dropdown list.
- Enter your Trulioo Normalized API (NAPI) username and password in the Username and Password fields.
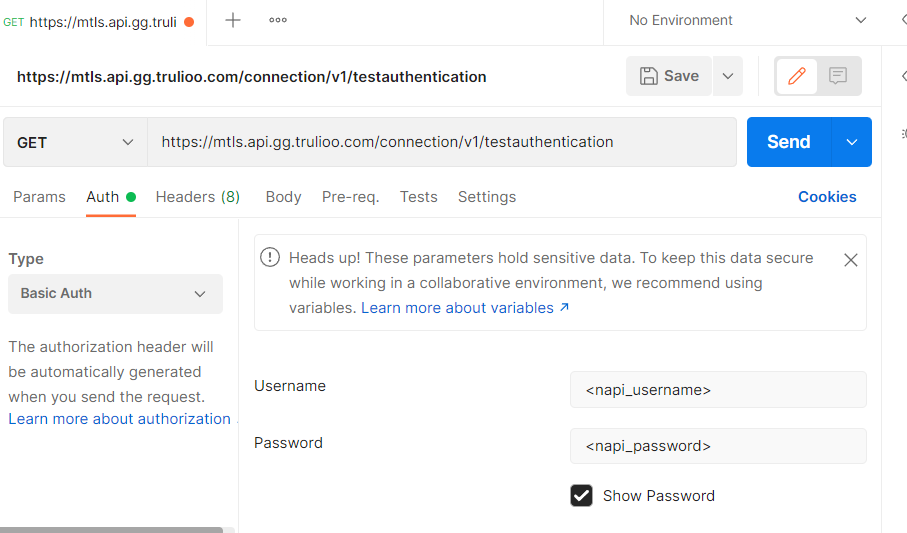
Sending a request
- Click Send to test your connection. If successful, you should see a "Hello" message in the response panel.
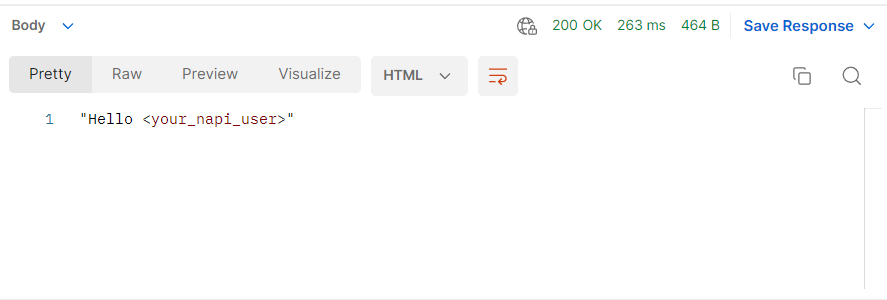
Successful connection response
Implementing mTLS
cURL
Add --cert and --key to your cURL command. If your private key is protected with a passphrase, enter it after the ":" in the --cert value.
curl --request GET \
     --url <<MTLSendpoint>>/connection/v1/testauthentication \
     --header 'Accept: application/json' \
     --user username:password \
     --cert './path/to/certificate':'passphrase, if any' \
     --key './path/to/key'
Nodejs
In the request options, pass an Agent object with the certificate, key, and optional passphrase.
const path = require('path');
const fs = require('fs');
const https = require('https');
const fetch = require('node-fetch');

const url = '<<MTLSendpoint>>/connection/v1/testauthentication';

const options = {
  headers: {
    Accept: 'application/json',
    Authorization: 'Basic ' + new Buffer('username:password').toString('base64'),
  },
  agent: new https.Agent({
    cert: fs.readFileSync(path.resolve(__dirname, './path/to/certificate')),
    key: fs.readFileSync(path.resolve(__dirname, './path/to/key')),
    passphrase: 'passphrase, if any',
  }),
};

fetch(url, options)
  .then((res) => res.json())
  .then((json) => console.log(json))
  .catch((err) => console.error('error:' + err));
Ruby
Set the certificate, private key, and optional passphrase in the Net:HTTP object.
require 'uri'
require 'net/http'
require 'openssl'

url = URI("<<MTLSendpoint>>/connection/v1/testauthentication")

http = Net::HTTP.new(url.host, url.port)
http.use_ssl = true

http.cert = OpenSSL::X509::Certificate.new(File.read('./path/to/certificate'))
http.key = OpenSSL::PKey::RSA.new(File.read('./path/to/key'), 'passphrase, if any')

request = Net::HTTP::Get.new(url)
request["Accept"] = 'application/json'
request.basic_auth("username", "password")  # provide basic auth

response = http.request(request)
puts response.read_body
Python
The urllib3 library doesn’t support including a passphrase with the client certificate but there is a workaround, documented below.
Without passphrase:
Pass the certificate and private key with the request.
import requests

url = "<<MTLSendpoint>>/connection/v1/testauthentication"

response = requests.get(url, auth=('username', 'password'), cert=('./path/to/certificate', './path/to/key'))

print(response.text)
With passphrase:
Create and mount a custom adapter that loads the certificate, key, and passphrase.
import requests
from urllib3.util.ssl_ import create_urllib3_context
from requests.adapters import HTTPAdapter

url = "<<MTLSendpoint>>/connection/v1/testauthentication"

cert_path = "./path/to/certificate"
key_path = "./path/to/key"
passphrase = "passphrase, if any"

class SSLAdapter(HTTPAdapter):
    def init_poolmanager(self, *args, **kwargs):
        context = create_urllib3_context()
        context.load_cert_chain(certfile=cert_path, keyfile=key_path, password=passphrase)
        kwargs['ssl_context'] = context
        return super().init_poolmanager(*args, **kwargs)

session = requests.Session()
session.mount("https://", SSLAdapter())

response = session.get(url, auth=('username', 'password'))

print(response.text)
